Handmade Leather Moccasins
Make a basic pair of pucker-toe soft sole moccasin with cuffs. Cuffs can be worn down or tied up for extra protection. Everyday moccasins were left plain, but they can be decorated with beads, ribbon or wool. You will need Leather and 1/8″ leather lacing, paper for the patters, awl, scissors and marking pen. We have an Eastern woodland’s Moccasin Kit with the materials you need to make your own!
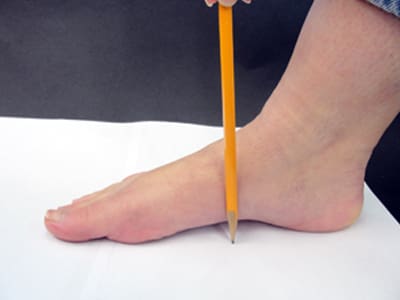
1. Firstly, to ensure a proper fit, create a paper pattern based on a tracing of your foot. Have someone trace your bare foot holding the pencil straight up & down on paper that measures at least 24” x 24”.

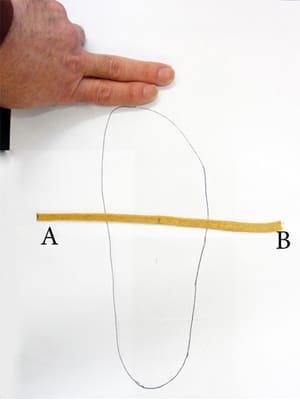
2. Secondly, wrap a string around the middle of your foot from the arch to the instep. Measure the length of the string. This measurement ensures a proper fit. It will go across the middle of your foot tracing and show you how wide to make your moccasin. Draw a line the length of your string across your foot tracing.
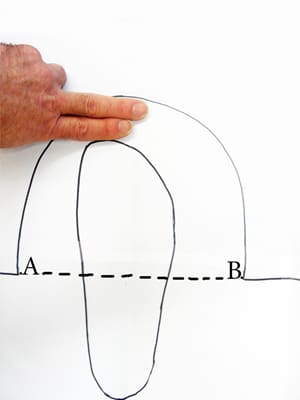
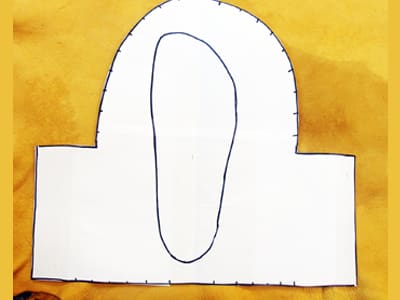
3. Then, add the width of two fingers to the toe end of your tracing and the width of one finger to the heel end. Additionally, mark each of these points. Using the points A & B and the mark at the top, draw an arch around your foot tracing as shown.
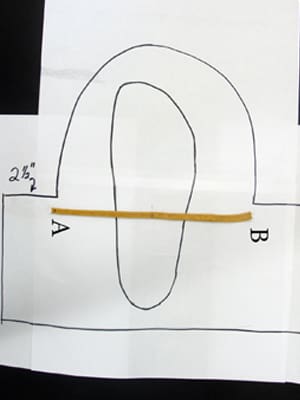
4. Fourthly, add 3 finger widths (approx. 2.5”) to each side at the instep where you measured width of your foot. This creates the cuff section of your moccasin.
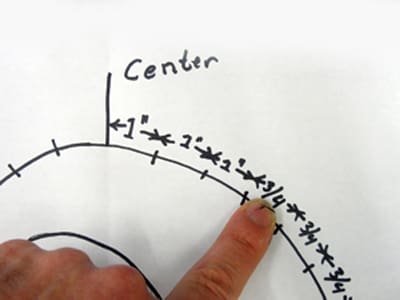
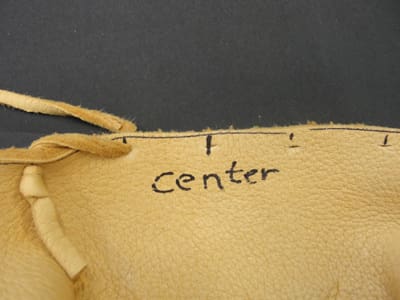
5. Fold the paper pattern in half from toe to heel to determine the center point. On both sides of the center point of the toe, measure and mark 1 thumb width space 3 times, then mark 1 finger width around the entire curved part of the pattern. Be sure that you have the same number of holes on both sides.

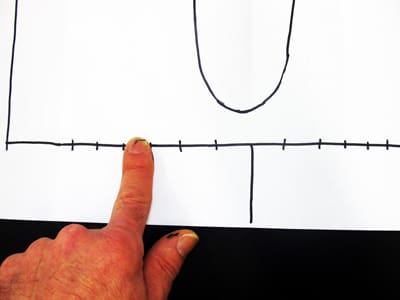
6. At the heel, measure and mark 3 thumb widths on both sides of the center, then mark finger widths, leaving the 3 finger widths (2.5”) on each side unmarked. You may want to wrap the paper pattern around your foot or cut out the pattern on fabric to see if you have enough allowances for sewing the seam before you cut out the leather. The moccasin should fit tightly because it will stretch with wear, but you must leave adequate space to get your foot in and out of it.

7. When you are ready to cut out the leather, trace the paper pattern on the leather. Them mark the notches you measured according to your pattern. Mark the pattern on the smooth side, so the suede side of the leather will be the outside of
the moccasin.* Turn the pattern and mark out the second moccasin as shown. (The moccasins will be the same, not a left and right. They will conform to the shape of your foot when you wear them). Cut out the pieces of leather. *We make them suede side out so they don’t show the dirt as much and the exposed cuff will the smooth.
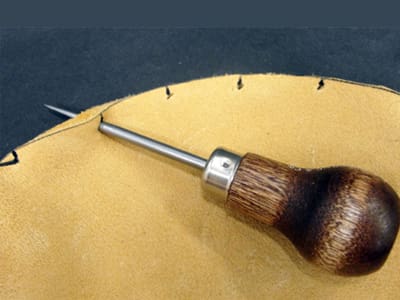
8. Use a leather awl* to poke holes in the leather at each mark about 1/8” from the edge of the leather. Then trim one end of the leather lacing to make a point and twist it. You will use this end to to lace the moccasin together. *Using a leather hole punch will make holes that are too big and will stretch out when you tighten the lacing.
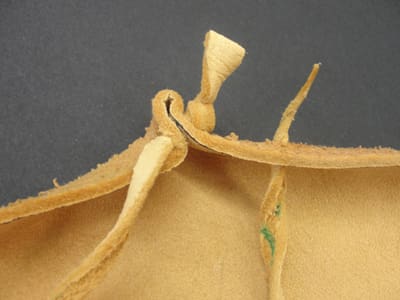
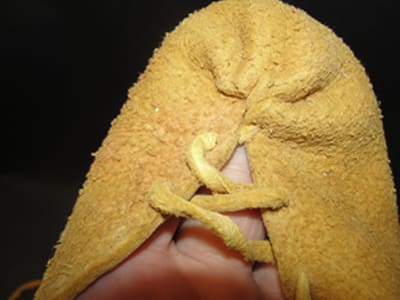
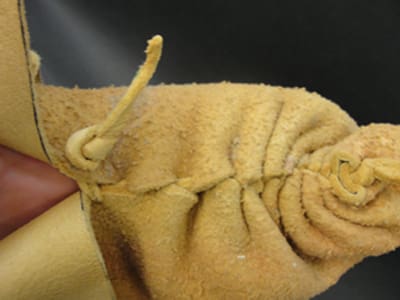
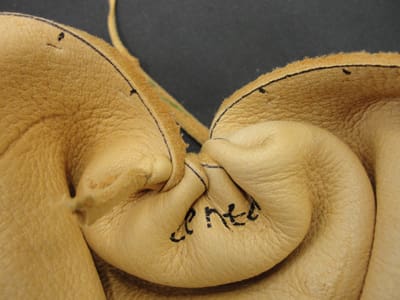
9. Knot the other end of the lacing and draw it through the center hole from the outside in (so the knot is on the outside of the moccasin). Then lace back and forth on each side from the inside of the moccasin (this is the Baseball Stitch). After each stitch, pull the lacing tightly straight down to create the puckering. You may want to stop an inch from the opening and start the heel to make sure you leave an adequate opening for your foot.
10. Put the moccasin on and pinch the back edge together at your heel. However if you have an excessive amount of leather recut the heel for the proper fit.
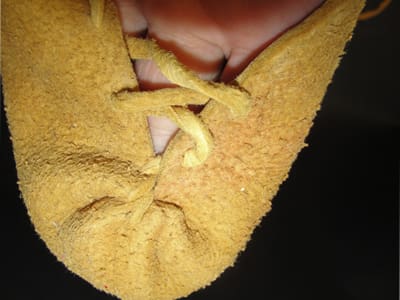
11. Try the moccasin on and adjust the top to accommodate your foot by pulling the lace tighter for more puckering or loosening it for more length. When you are confident you can get the moccasin on, knot the lace and cut. Use the remainder of the lacing for the heel.
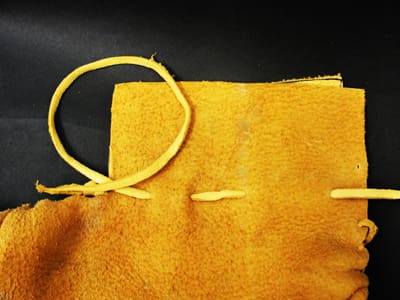
12. Knot the cut end of the lacing. Start sewing the heel from the inside, then at the second mark on the left of the center. Whip stitch the two holes on either side of the center point, coming up from the inside bottom for each stitch. Pull these four stitches tight.
13. Lace the remaining holes the same way as the top of the moccasin. End at the ankle and knot the lace.
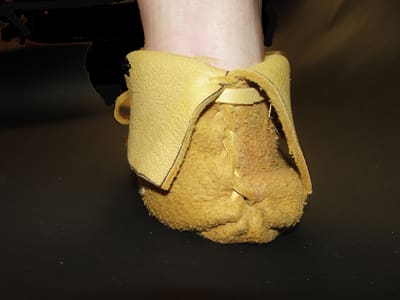
14. Next, attach a leather lacing piece around the ankle to tighten the moccasins on your feet. Then, punch four holes on each side of the ankle below the cuff and weave a piece of lacing through the holes. Finally, tie it in the front like a shoelace.
-
Eastern Woodlands Moccasin Kit
Price range: $57.95 through $62.95 Select options This product has multiple variants. The options may be chosen on the product page -
Deerskin (Top Grain) #2 – Gold
Price range: $100.63 through $135.13 Select options This product has multiple variants. The options may be chosen on the product page -
Leather Awl
$10.95 Add to cart -
Deerskin Lace – 5 feet x 1/4 inch
$4.00 Select options This product has multiple variants. The options may be chosen on the product page