Traditional Hairpipe Choker Instructions
Hairpipe chokers served many different purposes throughout history – They adorned and protected warriors’ necks before battle, and also served to represent social standing. Hairpipe Chokers made with Brass Beads are appropriate for ‘old style’ Regalia. You can wear Hairpipe Chokers made with Glass Crow Beads with both Traditional Regalia and Contemporary Regalia.
Materials Needed:
- 24 -1 1/2″ Hairpipe Beads
- 7 Prepunched Choker Spacers
- 100 Choker Beads (Glass or Brass)
- 1 -1 1/2″ Shell Disc
- 1- 4″ Deerskin Lace
- Imitation Sinew
- Craft Glue
You can acquire these materials separately or purchase a Traditional Hairpipe Choker Kit from The Wandering Bull, LLC.
Choker Construction:
2. Starting with the imitation sinew. Tie a knot in one end of the sinew 1″ from the end. Make sure the knot is larger than the holes in the choker strips. String the end of the sinew without the knot through one end hole of the choker strip. (See Figure A) Proceed to add beads, hairpipe and choker strips in the sequence shown in (figure A).
When you have added the seventh choker strip, the first row is complete! Do Not cut the sinew. String it down and through the second hole in the choker strip to start the second row (See Figure B). Repeat the bead sequence as in row one. Continue in this manner, passing through the next hole in the choker strip to create the third and fourth rows.
The direction of stringing is illustrated in Figure C.
3. When the four rows are laced in proper sequence, pull the lace carefully to tighten each row of the choker to medium tension. Don’t pull it too tight or your choker will be uncomfortable to wear. When you have the correct tension, tie off the remaining long end with a knot as shown in Figure A [labeled the end knot]. A drop of craft glue on the knots will help secure the ends. Tuck the remaining short ends of the imitation sinew back into the same holes for a nice finished look!
(See Figure D) Note: Save the remaining imitation sinew to attach the shell disc drop!
Adding the Shell Disc and Bead Drops:
4. Take the deerskin lace and cut it into three equal lengths of about 15″ each. Put two of the sections aside to use for the ties. Cut the third 15″ piece in half so you have two pieces approximately 7.5″ long. Use these shorter pieces to make leather fringe that hangs from the bottom of the bead drops. Fold one piece of the 7.5″ deerskin lace in half and punch a hole through both layers 1/4″ from the fold. String a piece of imitation sinew through both holes as shown in Figure E and pull it snug.
String up to half of the remaining beads onto the imitation sinew. (You may adjust the quantity of beads to suit your needs.) Then pass the sinew through one hole in the shell disc and around the middle of the center space then back through the shell disc. (See Figure F). Next, pass the sinew back through the top bead on the first half of the bead drop (See Figure G) and string an equal number of beads. Apply the second piece of fringe to this end as in Figure E.
Attach the Neck Ties:
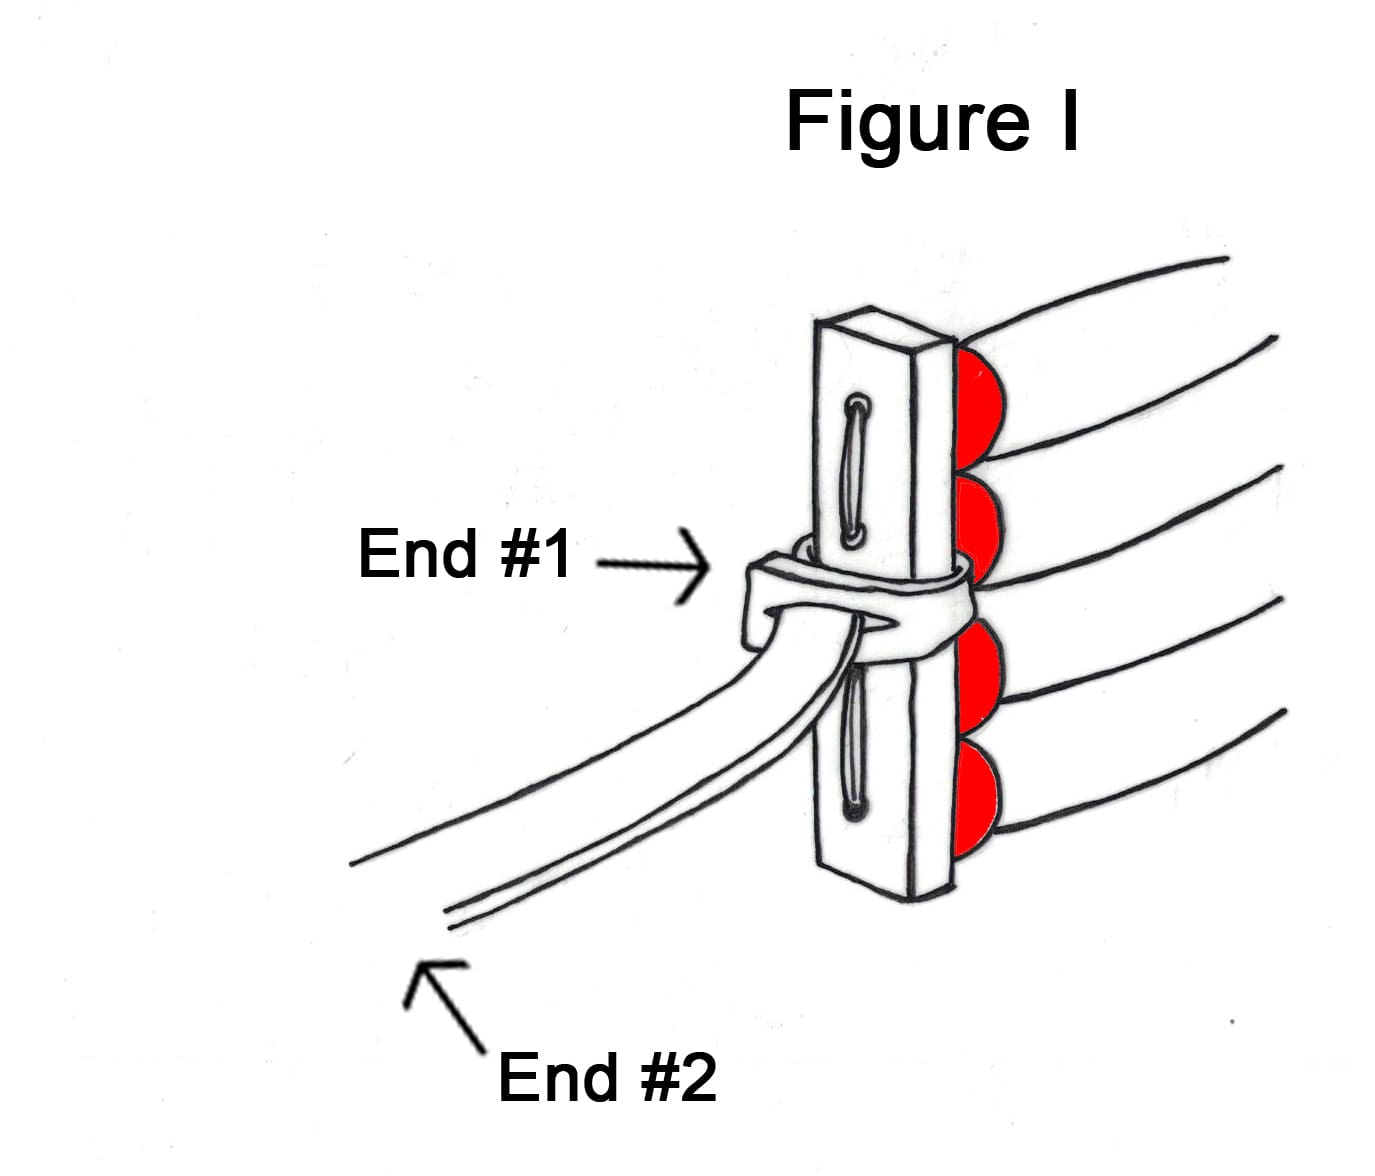
5. Use the two remaining 15″ deerskin laces to create the neck ties by attaching one to each end of the choker. Measure in 1/2″ from the end of the lace and cut a slit through the lace 1/2″ long. (See Figure H).
Then, wrap the slit end of the lace (end 1) around the middle of the end choker strip and thread end 2 back through the 1/2″ slit (See Figure I), and pull snug and secure.
Attach the remaining tie to the opposite end following the same steps.
Your Hairpipe Choker is Now Complete!
Create your own Traditional Hairpipe Choker using products provided by WanderingBull.com! Shop our Craft Kits >>
-
Czech Glass Crow Beads
Price range: $9.95 through $109.95 Select options This product has multiple variants. The options may be chosen on the product page -
Bone Hairpipe
Sale! Price range: $2.50 through $738.00 Select options This product has multiple variants. The options may be chosen on the product page -
Leather Choker Spacers
Price range: $1.93 through $38.44 Select options This product has multiple variants. The options may be chosen on the product page -
Plastic Hairpipe
Price range: $1.60 through $39.95 Select options This product has multiple variants. The options may be chosen on the product page