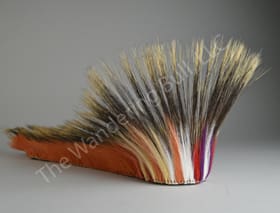
How to Make a Porcupine Roach. The Porcupine Roach is one of the most beautiful and practical headpieces of Native Americans. Many different men’s dance styles use porcupine roaches. The following directions will show you how to make a long porcupine roach. You can also use the same technique to make a shorter or a round porcupine roach.
Materials Needed:
- Porcupine hair
- Roach Base
- Imitation Sinew
- Deer Tails
- Large Needle
- Scissors
- Frame for tying rows of hair
- Glass Jar/ Cup approx. 4″ tall x 3″ wide (to hold the Porcupine hair)
- Roach Stick (a 2.5″ dowel 6″ longer than the finished roach – with a nail in the top to hold the roach in place)
- Elastic style bandage for wrapping completed roach
Let’s get started:
Build a portable frame. (See Diagram #1)
We suggest using 12” uprights, so the frame can be placed on your lap to work. The base cord is a full strength piece of multi-ply Imitation Sinew. Fasten it at each end so that you can untie it and adjust it as needed. The complete length of po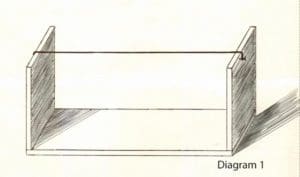 rky hair is tied on one length so depending on the size of the roach, you may have to slide the sinew along for added lengths.
Sorting:
Sorting porky hair is the key to a good looking roach. Put the porky hair in a glass and shake it until all of the hairs are touching the bottom of the glass. Starting with the longest hairs, pull the hairs out and sort the hair by length (ex. 7”, 6”, 5”, etc). Occasionally shake the glass up and down, so the hairs settle to the bottom again. (See Diagram #4) Bundle each group of hair in an elastic.
Take the longest bunch of sorted hair and divide it into 4 bundles.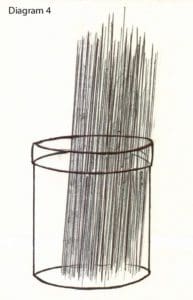
Take the balance of the bunches and divide each of them into 2 bundles.
Note: you are sorting hair for one entire row around the base and one partial row for the front of the roach.
Tying Porcupine Hair:
When tying the porky hair, start in the middle (this will be the front of the roach) of the base cord and work to one end, then to the other. This way the hair is graded by size.
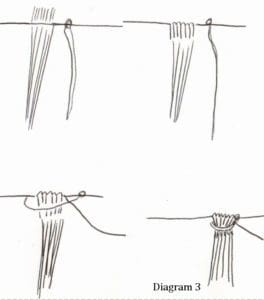 To make the short partial row that goes in the from of the roach, take 2 of the bundles of the longest hair. You will use one bundle for each side of the partial row. Put one bundle into your cup, shake the cup, (See Diagram #4) and pinch out a bundle of about 18 hairs. Fold approx. 3/8″ of the hair at the cut end over the base cord. Loop the tying cord around the hair bundle and tie it off with a half hitch knot. (See Diagram #3).
Work across 3″ on each side. The total length of the partial row is 6”. Any extra hair left aft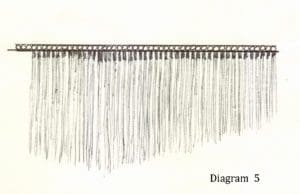 er tying this 6” row can be added to the appropriate size of the remaining bundles of porky hair.
To tie the main row of porky hair, again start in the middle and work to each end. Use one bunch of each size hair per side. The longest hair goes in the front. Porky hair gets shorter toward the back of the roach. (See Diagram #5)
Tying Deer Hair:
When you tie the row of deer hair, use only the white (or dyed) hair on the edges of the tail. Do not use the dark hair. Cut the tail hair from the flesh side with a sharp knife. You will see a color difference between the white and dark hairs on the tail through the skin. (See D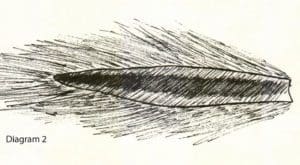 iagram #2 for guidance on where to cut away dark hair.) Do not cut the hair from the tail all at once.
Working from right to left on your loom, tie one ply of sinew to the base cord. Snip off a small bundle of hair from the tail. Fold the approx. 3/8″ of the cut end of the hair over the base cord. Loop the tying cord around the hair bundle and tie it off with a half hitch knot. (See Diagram #3 above)
Continue to tie bundles of hair on the base cord until you have enough go around the roach base. It’s a good idea to add 3-4 inches extra to compensate for irregularities in the base. The row of deer hair will be sewn on after the porky hair rows are sewn on.
Assembling:
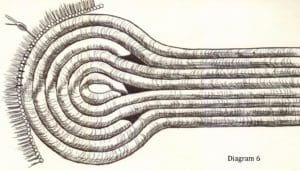
Thread the large sharp needle with one ply of imitation sinew. Tie a knot in the end and bring the needle through the front center of the base. (See Diagram #6)
Sew the partial row of porky hair to the base from the center to each end. Sew every second bundle down into the base. Do not pull tight or you will “buckle” the base. (See Diagram #6)
Next, sew the full row of porky hair to the base. Use the above procedure, except sew it over the partial row of porky hair. (See Diagram #8)
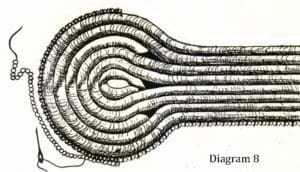
Finally, sew the row of deer hair to the base, through the row of porky hair. At this point the roach will look like a disaster, with hair going every direction. Don’t worry! That’s how it should look.
Make a “roach stick” to wrap your roach on. A 2.5” diameter dowel with a peg in the end is fine. The stick should be 6” longer than the roach base. Often these are tapered, or ornately carved. (See Diagram #9)
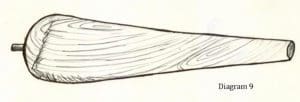
Place the peg or nail on the end of the stick. Place the porcupine roach over the peg or nail. Smooth the hairs down around the roach stick. Make sure the hairs are going in the proper direction. Wrap an elastic bandage (like an ACE bandage) around the roach starting at the peg spiraling down to the end of the roach.
(See Diagram #10)

Wet the roach through the bandage until everything is totally wet (but not dripping). Allow the roach to dry fully with bandage wrapped around it.
When unwrapped, gently comb the hairs and shape. Repeat the wrapping procedure each time you store your roach.
Do not leave the roach unwrapped between uses. Occasionally dampen the roach and allow it to reshape.
Find Craft Supplies!
The Wandering Bull Native American Trading Post offers several Native American Regalia Craft Kits. Click Here to see all of our kits!
-
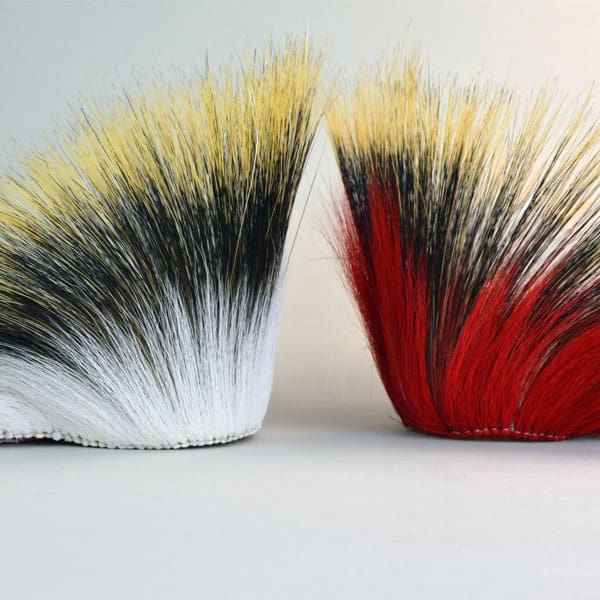
Roach – 16 and 18 inch Porcupine
$425.00 Select options This product has multiple variants. The options may be chosen on the product page -
Roach – Round Eastern Style
$130.00 Select options This product has multiple variants. The options may be chosen on the product page -
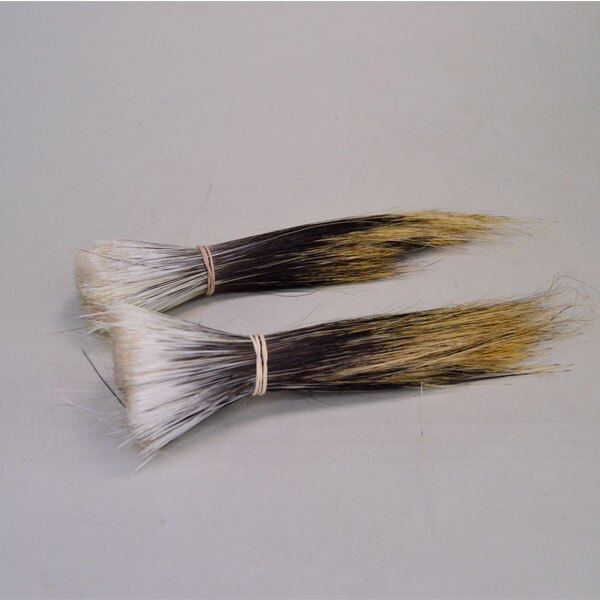
Porcupine Guard Hair
Price range: $57.95 through $95.95 Select options This product has multiple variants. The options may be chosen on the product page -
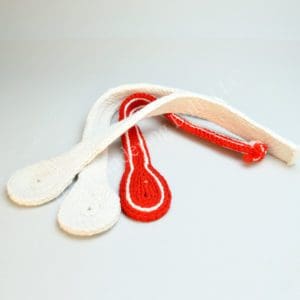
Roach Base 18 inch
$22.00 Add to cart
